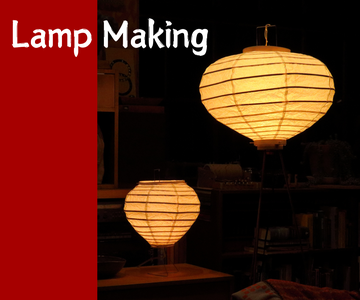
Introduction: Paper Lantern Lamps

Supplies

- Cardboard
- Basket Weaving Reeds
- Paper, thin and durable (like rice paper)
- Mod Podge
- Lightbulb Socket
- Clothespins
- Wooden skewer
- Wire, wood, skewers (for the base)
- Box cutter, scissors, razor blade
- 2 chairs and a wood dowel (made applying the paper easier)
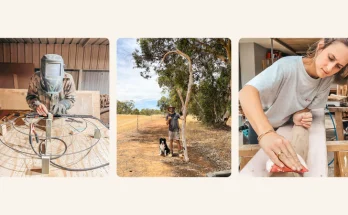
Step 1: Making the Cardboard Scaffold


Start off by creating the scaffold for the lampshade’s shape. I did this with cardboard, which will be removed once the shade is completed. It consists of eight vertical (longitudinal) ribs, and a circular piece at the top and bottom to hold it all together. I aligned all the longitudinal ribs and drew diagonal markings on the outside edge. A slit was cut at each mark on every rib. This allowed me to place the basket-weaving reeds in an even spiral. Make sure to number each of the ribs to help reduce confusion when assembling.
Step 2: Wrapping the Form


Now that the scaffold is created, soak the reeds in warm water for about ten minutes. Once they have softened up a bit, wrap them around the frame. The slits made in the cardboard should help to hold them in place, but I found that clothespins still helped to hold it all together until dry. Make sure to overlap the ends of the reeds, then once dry, go back and glue them together.
Step 3: Gluing the Paper Shade


Now cut eight panels of paper. Each panel should cover one full section between the cardboard scaffolding. I created a stand for this process by running a wooden dowel through the scaffold form and then spanning it between two chairs so that the lantern can easily be rotated while gluing. Crumple up the paper to add texture. Apply Mod Podge to the reeds (make sure not to get any on the cardboard!). Glue down every other piece of paper (four panels, four gaps). Once these first four panels are glued, cut off the excess paper with a razor blade (or scissors).
Step 4: More Paper


Now, apply glue to the remaining reeds, as well as the edge of the paper that is already glued down. These next four panels of paper should be glued to the reeds and the edges of the first four panels. Again, cut off the excess paper. Once the glue has dried, carefully remove the cardboard scaffolding. The lantern is now complete and it can be flattened!
Step 5: Making the Base and Assembling


The base is somewhat reliant on your light socket. Here you see me creating a small piece of wood that can attach the light socket to the paper shade with small dowels pushed into the end of the wood. I also drilled holes for the wire legs, as well as, for the wire that protrudes above the shade and holds it up. Now, assemble all the pieces and switch the light on!
Step 6: Let There Be Light


Experiment with different shapes and sizes for the paper lantern and design your own base for a unique look. I made both a table lamp and a floor lamp. Enjoy the process!